$ oc debug node/<node name>
$ chroot /host
$ lspci | grep -i nvidia
17:00.0 3D controller: NVIDIA Corporation TU104GL [Tesla T4] (rev a1)
65:00.0 3D controller: NVIDIA Corporation TU104GL [Tesla T4] (rev a1)
Tag: stable diffusion
Stable Diffusion on OpenShift with GPU Sharing
13 December 2022
Tags : openshift, gpu, aiml, stable diffusion
Stable Diffusion on OpenShift with GPU Sharing
So the intuitive follow on from the last blog post Stable Diffusion for Fedora Core is of course to see if we can get the app running on OpenShift in a lab environment!
There are a couple of challenges. In my case, i actually wanted to demo the app in a lab that contains some older Nvidia-Tesla-T4 GPU’s, a bare metal SNO instance along with a bunch of other GPU enabled apps. This raises some interesting questions, in particular how do we configure and deploy applications so they can share the GPU’s in this environment?
One of the best article i found describing GPU Sharing and the various mechanisms involved, highlights the different options available.
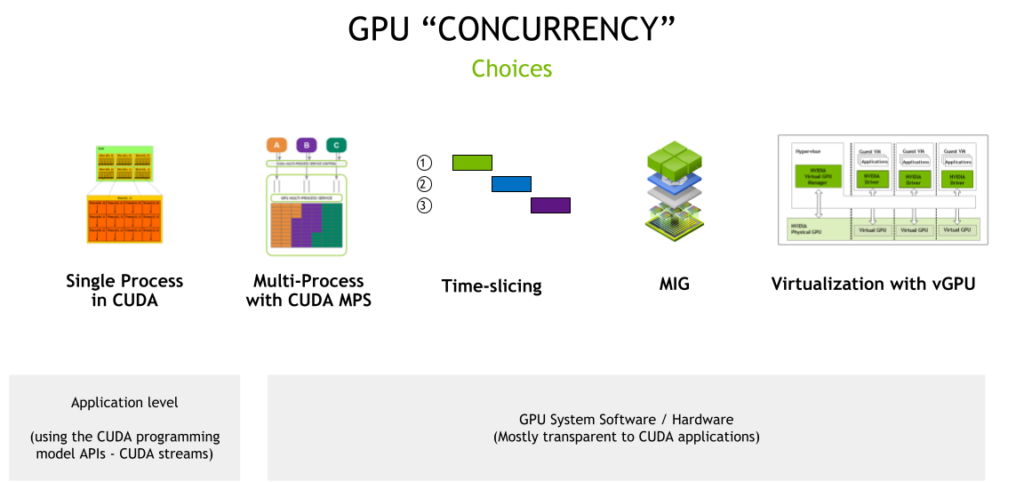
We are interested primarily in the system software and hardware part of this picture (CUDA and MPS-CUDA are more at the application level). Although, Stable Diffusion does require working CUDA for python torch as well.
MIG (which stands for multi instance GPU) is the newest technology and only supported on a small number of cards (not the T4') like vGPU (A100 and A30). There are some great OpenShift blogs describing MIG usage. vGPU is a technology that is only available if OpenShift is running in a VM/hypervisor. vGPUs are created/configured at the hypervisor level independently of OpenShift.
So, that leaves us with Time-slicing. The best place to read about it is on the Nvidia site. Unlike MIG, there is no memory or fault-isolation between replicas, but for some workloads this is better than not being able to share the GPU at all. There is a lot of documentation to read, so i’m going to summarize the steps to get OpenShift Bare Metal SNO working using time-slicing.
Installing the Node Feature Discovery (NFD) Operator
The first step after installing OpenShift SNO bare-metal, was to configure the NFD operator as cluster-admin. The default configuration for the operator is fine. All going well, your GPU’s should now be visible to OpenShift, and you can check by doing:
We can see our two physical GPU’s OK. Another check is the node labels and description:
$ oc describe node | egrep 'Roles|pci' | grep -v master
   feature.node.kubernetes.io/pci-10de.present=true
If you see the pci-10de device, that is the code for Nvidia GPU’s, all good so far.
Installing the NVIDIA GPU Operator
Next step is to install the Nvidia GPU Operator. By default you should not need to install any license as OpenShift 4.9.9+ is entitlement free. There are several pods that install with this operator. If you install the default Cluster Policy the nvidia driver is downloaded and compiled for your OpenShift and inserted as dynamic kmods. This may take a little bit of time to complete.
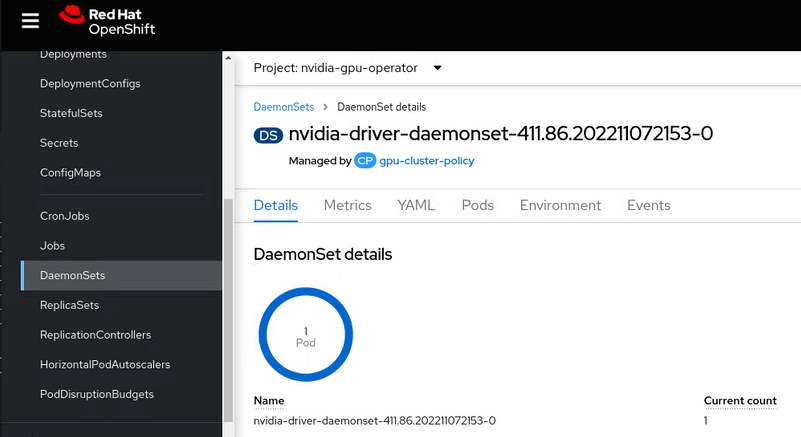
In our case, we only have one node (SNO) so the dameon set compiles and installs the driver on our node. If you follow the documentation above you should be able to verify the drivers are loaded.
$ oc debug node/<node name>
$ chroot /host
$ lsmod | grep nvidia
nvidia_modeset       1142784  0
nvidia_uvm           1310720  2
nvidia              40796160  363 nvidia_uvm,nvidia_modeset
drm                   589824  4 drm_kms_helper,nvidia,mgag200
Its worth noting that if you were using vGPU, you would also get the nvidia_vgpu_vfio module, but because we are bare metal, the driver dameon set recognizes passthrough mode and does not compile it.
The second part of the puzzle is you need to now configure the GPU for time-slicing. To do this we need create a ConfigMap that specifies how many slices we want, for example 8 in our case.
kind: ConfigMap
apiVersion: v1
metadata:
  name: time-slicing-config
  namespace: nvidia-gpu-operator
data:
  tesla-t4: |-
    version: v1
    sharing:
      timeSlicing:
        resources:
        - name: nvidia.com/gpu
          replicas: 8
Next, we add this ConfigMap name into the nvidia.com ClusterPolicy.
                  devicePlugin:
                    config:
                      default: "tesla-t4"
                      name: "time-slicing-config"
                    enabled: true
By enabling the devicePlugin you should see the device plugin DaemonSet spin up.
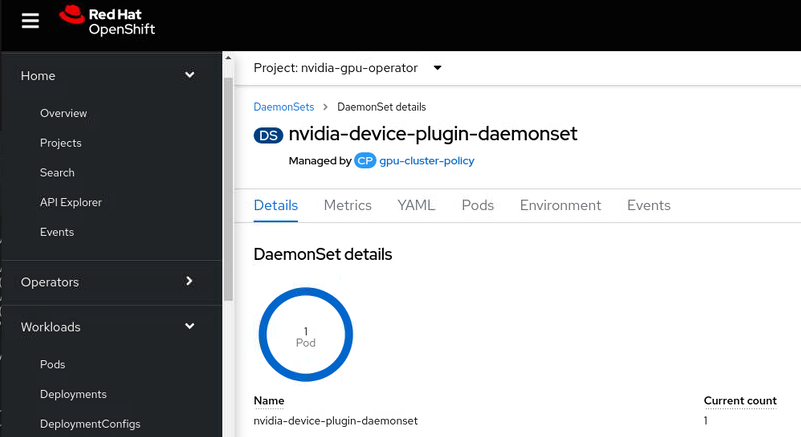
We are nearly there ! If we now look at the OpenShift node description, we should see how many GPU’s OpenShift now thinks it has.
$ oc describe node| sed '/Capacity/,/System/!d;/System/d'

Capacity:
  ...
  nvidia.com/gpu:                 16
Allocatable:
  ...
  nvidia.com/gpu:                 16
So great ! that is 8x2=16 time-sliced GPU’s available.
Deploy Stable Diffusion
I have created a simple Kustomize folder in the git repo and split out the two part needed to get the app running.
First create a data download job (this is 6 GB of downloads), which creates a PVC using he default Storage Class to download the required Stable Diffusion model data.
oc apply -f create-data/app.yamlThen run the deployment.
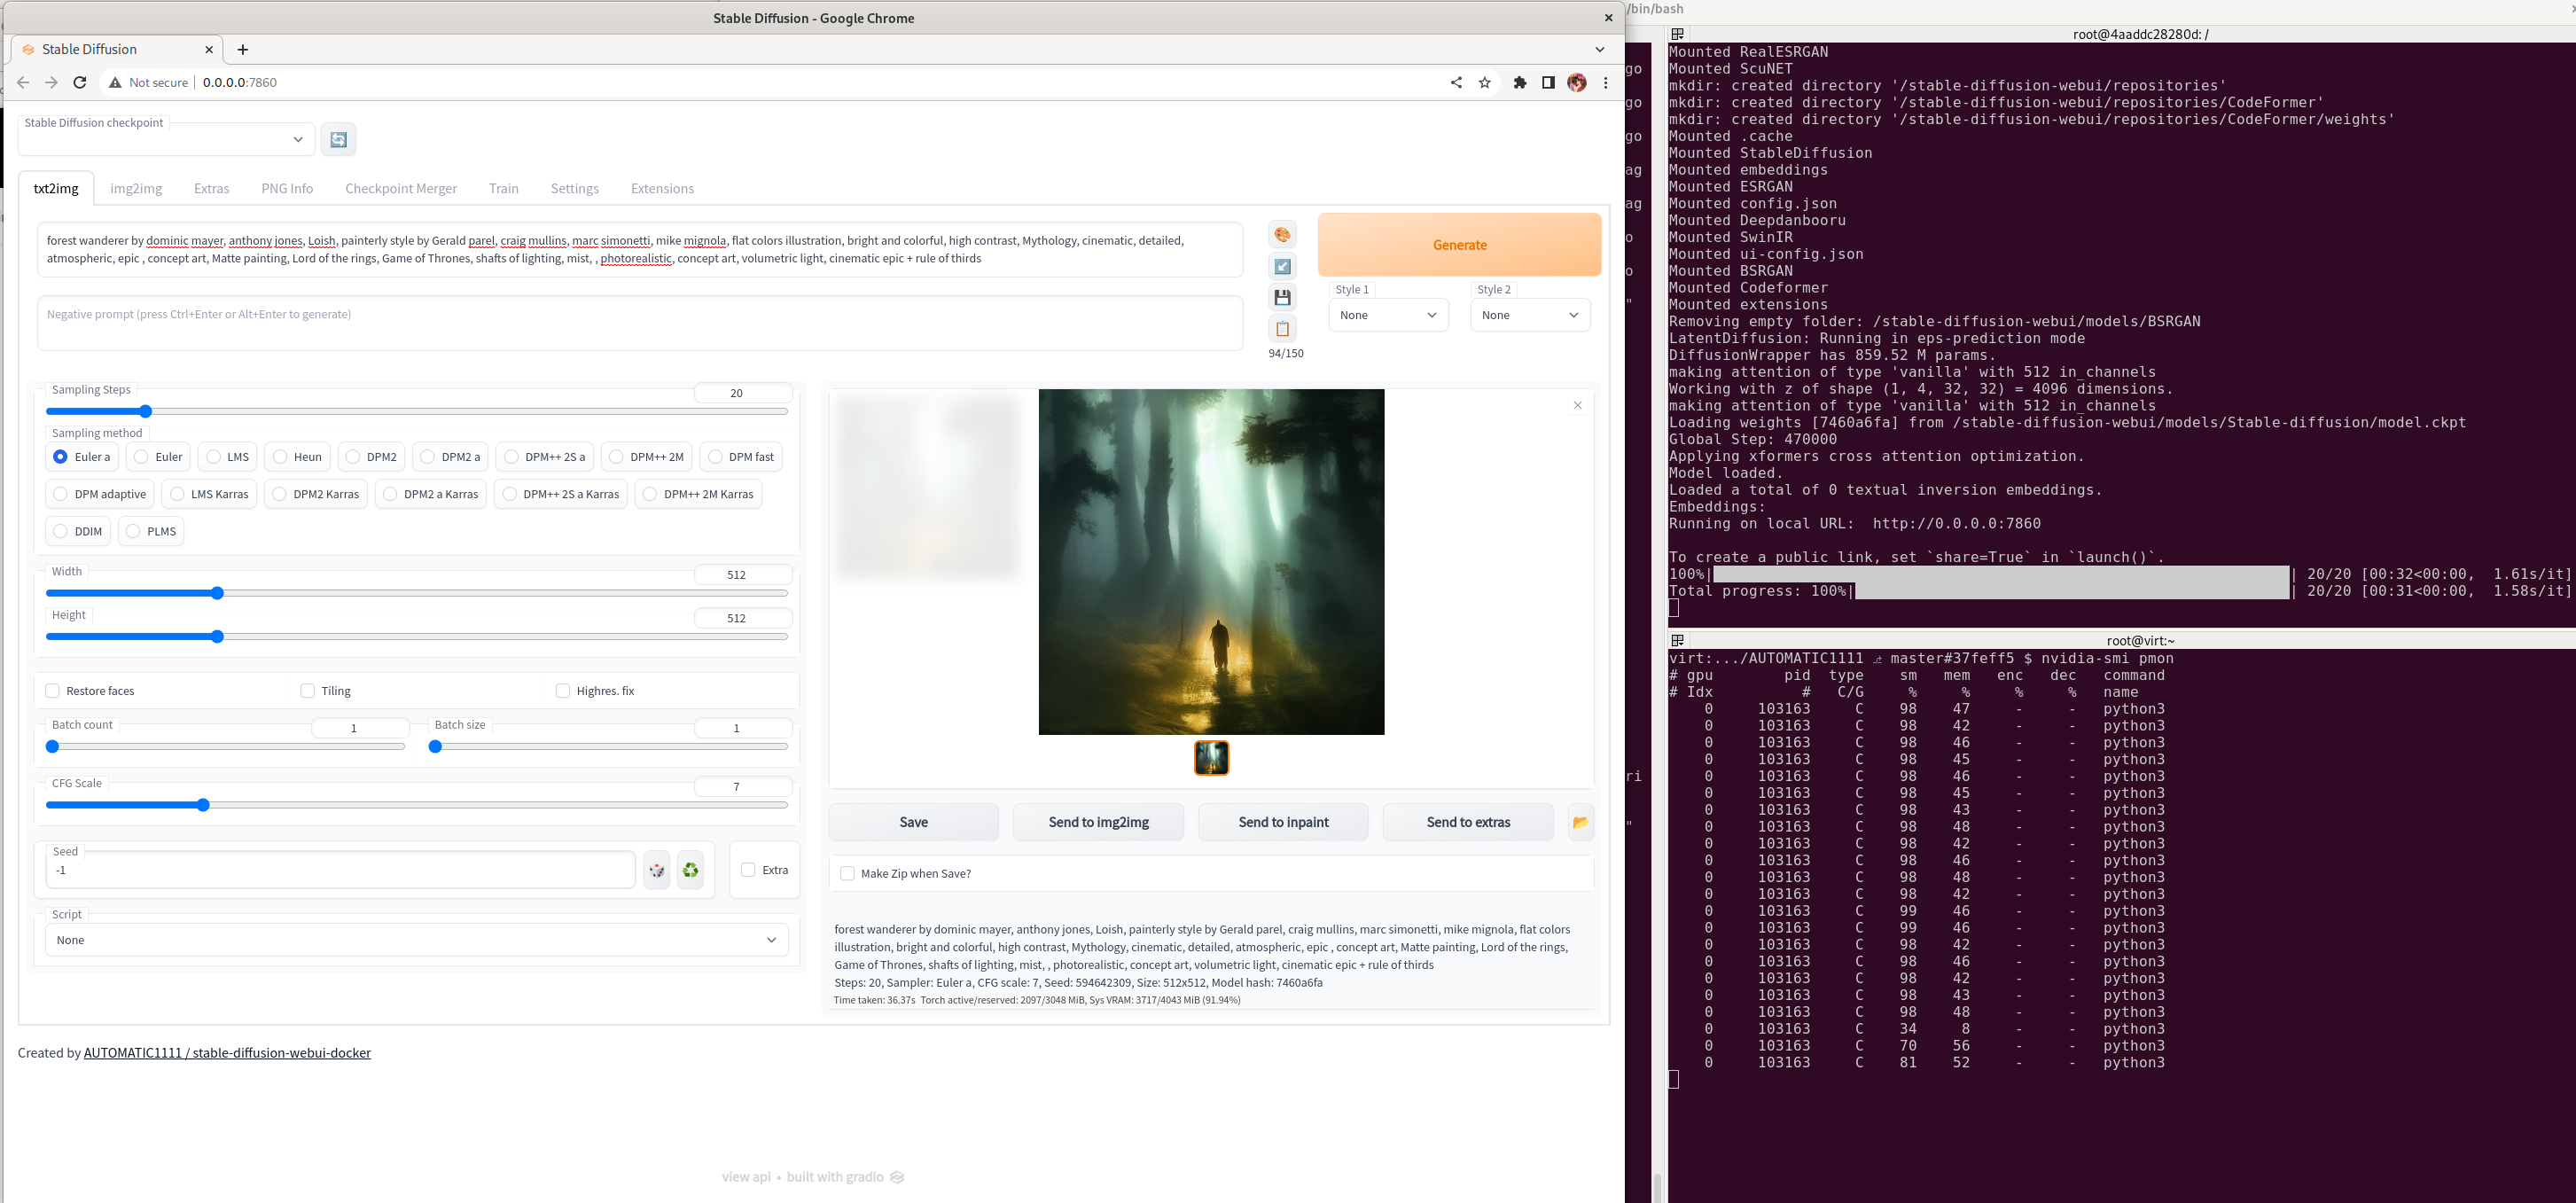
oc apply -f create-app/app.yamlHere’s an example of a run on the lab, showing the nvidia-smi pmon on the shell for the running python process and an output text to image.

In our Deployment we only requested one GPU, so we get one time-sliced gpu.
resources:
limits:
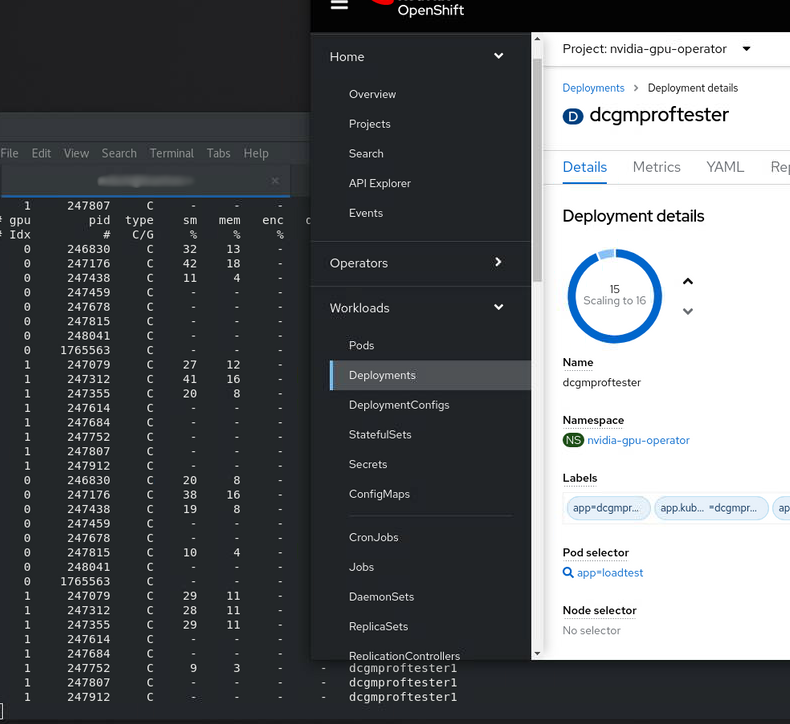
nvidia.com/gpu: 1You can scale this up, or use the nvidia sample image to test out time-slicing and sharing e.g. Create a Deployment using this image.
        replicas: 16
        image: nvidia/samples:dcgmproftester-2.0.10-cuda11.0-ubuntu18.04
        resources:
          limits:
            nvidia.com/gpu: "1"
And hey presto ! we now see 15/16 app replicas spinning up and running on our 2 physical GPU’s. You can see them easily using nvidia-smi pmon. We don’t quite get to 16 as Stable Diffusion is still running on the GPU as well!
Stable Diffusion for Fedora Core
23 November 2022
Tags : fedora, gpu, aiml, stable diffusion
Stable Diffusion for Fedora Core
If you have not heard about it, Stable Diffusion is a text to image ML model generator. I wanted to demo a GPU with podman and OCI like a pro and I don’t want to use to the awesome but boring docker.io/nvidia/samples:vectoradd-cuda11.2.1
Watching numbers add .. erm, yeah. This is 2022 baby!
So let’s see if we can build this Stable Diffusion thing on fedora. The setup is painfull .. I warn you now. But its worth the effort - trust me…
Getting Setup
I have a 4 (nearly 5 ?) year old work laptop - a dell-xps-15. It has been a real workhorse 🐴 ! But, if you have been running fedora for as long as i have, you will know that running NVIDIA graphics has been .. well, torturous to say the least over the years. Things have gotten way better.

So strap yourself in ! At least these days, NVIDIA play very nicely in the Open Source community, so hopefully you will not need to "do a Linus" as we probably all have over the years.
Here’s my hardware devices:
$ lspci | egrep -i 'vga|nvidia'
00:02.0 VGA compatible controller: Intel Corporation HD Graphics 630 (rev 04)
01:00.0 3D controller: NVIDIA Corporation GP107M [GeForce GTX 1050 Mobile] (rev a1)
Its worth noting that i run my display with the perfectly acceptable intel i915 gpu (on the mother board). For one thing, it runs a lot cooler than the NVIDIA card, so less noisy overall as the fans don’t scream. You can blacklist the nvidia drivers then dracut -f the boot image:
$ cat /etc/modprobe.d/blacklist_video.conf
blacklist nouveau
blacklist lbm-nouveau
blacklist nvidia-current
alias nvidia nvidia_drm nvidia_modeset nvidia_current_updates
alias nouveau off
alias lbm-nouveau off
OR, you can set up the kernel to boot using i915.modeset and blacklist there as well. I also blacklist the default nouveau driver because, err - it runs like a dog! You never want to use it when you have other options, like two perfectly good graphics card drivers to choose from!
$ cat /etc/default/grub
GRUB_CMDLINE_LINUX="i915.modeset=1 quiet rhgb intel_iommu=on modprobe.blacklist=nouveau,nvidia,nvidia_drm,nvidia_modeset rd.driver.blacklist=nouveau"
One other thing i find very handy, is to run graphics using the intel gpu, and then use the NVIDIA gpu for AIML, or to pass through via PCI to OpenShift SNO running in libvirt, so i set intel_iommu=on as well for good measure. This seems to confuse people, but if you want to pci passthrough the device to libvirt … you cannot share it ! i.e. don’t run your main monitor using the NVIDIA card, and expect to share it with a VM using pci-passthrough.
Make sure to recreate your (in my case UEFI) bootloader grub2-mkconfig -o /boot/efi/EFI/fedora/grub.cfg if you change any of these.
Sadly, you are not done. What you need now is a running NVIDIA, CUDA drivers for your operating system. I’m running fc36. So many years, so much pain here, so many crappy blogs giving you bad advice. OK .. so this is my advice, if you are starting with a broken system, dnf erase nvidia* is your best bet. Start from a clean state.
For fc36, use the f35 repo. There is also a f36 repo that is known not to work!. Why is this? i don’t know, i have not debugged the C/C++ yet, but dkms will fail to compile the kernel driver if you try the fc36 repo (and the nvidia driver version is lower, so go figure?).
dnf config-manager --add-repo https://developer.download.nvidia.com/compute/cuda/repos/fedora35/x86_64/cuda-fedora35.repo
dnf -y module install nvidia-driver:latest-dkms
dnf -y install cuda
Now, you will also need (cuDNN) which is a GPU-accelerated library of primitives for deep neural networks. The easiest way i found to install this is to grab the local repo as rpm and install it. You need to download it here from nvidia.
dnf -y install cudnn-local-repo-rhel8-8.5.0.96-1.0-1
tree /var/cudnn-local-repo-rhel8-8.5.0.96/
dnf install -y /var/cudnn-local-repo-rhel8-8.5.0.96/libcudnn8-8.5.0.96-1.cuda11.7.x86_64.rpm
dnf erase cudnn-local-repo-rhel8-8.5.0.96-1.0-1
Once you have libcudnn installed, you can uninstall the local repo. There may be a better way, but 🤷
I use a simple shell script to load my nvidia driver when i need it.
$ cat ~/bin/nvidia.sh
#!/bin/bash
# we have these blacklisted on boot so we can load i915
sudo dkms status
sudo modprobe nvidia_drm modeset=1 nvidia_modeset nvidia
sudo ldconfig
For podman, you will need to do the following
-
install nvidia drivers as above, make sure
nvidia-smiworks on the host (see testing in next section) -
Install
nvidia-container-toolkit
curl -s -L https://nvidia.github.io/libnvidia-container/rhel8.6/libnvidia-container.repo | sudo tee /etc/yum.repos.d/nvidia-container-toolkit.repo
dnf install -y nvidia-container-toolkit-
Modify
/etc/nvidia-container-runtime/config.tomland change these values (needed because ofcgroupsv2and the desire to run the pod rootless if possible)
[nvidia-container-cli]
#no-cgroups = false
no-cgroups = true
#user = root:video
user = "root:root"
[nvidia-container-runtime]
#debug = "/var/log/nvidia-container-runtime.log"
debug = "~/./local/nvidia-container-runtime.log"
You should now be good to go.
Test Your Local Setup
Let’s get some things working. Needless to say if any of these steps fail, you are going to have to debug and fix them 🛠️ !
This is always my first check, from your shell:
$ nvidia-smi

Wed Nov 23 05:21:19 2022
+-----------------------------------------------------------------------------+
| NVIDIA-SMI 520.61.05    Driver Version: 520.61.05    CUDA Version: 11.8     |
|-------------------------------+----------------------+----------------------+
| GPU  Name        Persistence-M| Bus-Id        Disp.A | Volatile Uncorr. ECC |
| Fan  Temp  Perf  Pwr:Usage/Cap|         Memory-Usage | GPU-Util  Compute M. |
|                               |                      |               MIG M. |
|===============================+======================+======================|
|   0  NVIDIA GeForce ...  Off  | 00000000:01:00.0 Off |                  N/A |
| N/A   56C    P8    N/A /  N/A |      0MiB /  4096MiB |      0%      Default |
|                               |                      |                  N/A |
+-------------------------------+----------------------+----------------------+

+-----------------------------------------------------------------------------+
| Processes:                                                                  |
|  GPU   GI   CI        PID   Type   Process name                  GPU Memory |
|        ID   ID                                                   Usage      |
|=============================================================================|
|  No running processes found                                                 |
+-----------------------------------------------------------------------------+
If podman setup correctly this will also work in a pod (note this is rootless and done as my normal user):
podman run --rm --security-opt=label=disable \
--hooks-dir=/usr/share/containers/oci/hooks.d/ \
docker.io/nvidia/cuda:11.2.2-base-ubi8 \
/usr/bin/nvidia-smi
We can now check that a python container will find your GPU and CUDA setup correctly. Stable Diffusion uses the torch library, but if things don’t work tensorflow gives you a lot more details about any failure (libraries, cuda version mismatch etc). It is worth pointing out you must have the same CUDA libs in both places (your host and image), so make sure you do! (see the Dockerfile for Stable Diffusion later on).
podman run --rm -it --privileged \
--security-opt=label=disable \
--hooks-dir=/usr/share/containers/oci/hooks.d/ \
docker.io/tensorflow/tensorflow:latest-gpu
You should be able to check that the nvidia device is available in the pod:
root@3e8c8ba4e6fb:/# ls -lart /dev/nvidia0
crw-rw-rw-. 1 nobody nogroup 195, 0 Nov 23 01:26 /dev/nvidia0
Then check that tensorflow can see your GPU, this will give you detailed messages if it cannot find your drivers and libraries:
root@3e8c8ba4e6fb:/# python3.8
Python 3.8.10 (default, Jun 22 2022, 20:18:18)
[GCC 9.4.0] on linux
Type "help", "copyright", "credits" or "license" for more information.
>>> import tensorflow as tf
2022-11-23 06:37:46.901772: I tensorflow/core/platform/cpu_feature_guard.cc:193] This TensorFlow binary is optimized with oneAPI Deep Neural Network Library (oneDNN) to use the following CPU instructions in performance-critical operations:  AVX2 FMA
...
>>> tf.test.gpu_device_name()
2022-11-23 06:37:52.706585: I tensorflow/core/common_runtime/gpu/gpu_device.cc:1613] Created device /device:GPU:0 with 3364 MB memory:  -> device: 0, name: NVIDIA GeForce GTX 1050, pci bus id: 0000:01:00.0, compute capability: 6.1
'/device:GPU:0'
The last line '/device:GPU:0' is good. Now, we can also check torch works (you can leave this check till later, once you have built or pulled the Stable Diffusion image)
$ pip3.8 install torch --user
$ python3.8 -c "import torch; print(torch.cuda.is_available())"
True
If that returns False, then something is amiss.
Build the Stable Diffusion Image
OK, the instructions from here should be straight forward and i have put the instructions in a git repo here. Strictly speaking you can just grab the image and run it if you have a similar setup to mine podman pull quay.io/eformat/sd-auto:14-02. Be warned its a 6GB image!
You will need some time ☕ and storage available! The AI model downloads use approx (12GB) of local disk 😲 and we use the aria2 torrent client to grab all the bits needed.
Download the data.
dnf -q install aria2
./download.sh
Then we can build the container using podman. There is a Makefile to make your life easier.
make buildThen we can run it using podman. Note: you have to mount the download/data folder so set DATA_DIR=<full path>/download/data appropriately. We also run the pod as privileged which should not ne strictly be necessary (/dev/nvidia0 is not found otherwise, this needs fixing up).
podman run --privileged -it -p 7860:7860 -e CLI_ARGS="--allow-code --medvram --xformers" \
-v $DATA_DIR:/data:Z \
--security-opt=label=disable \
--hooks-dir=/usr/share/containers/oci/hooks.d/ \
quay.io/eformat/sd-auto:14-02
Demo It!
Browse to http://0.0.0.0:7860/ and type in some text. In this example i was using:
forest wanderer by dominic mayer, anthony jones, Loish, painterly style by Gerald parel, craig mullins, marc simonetti, mike mignola, flat colors illustration, bright and colorful, high contrast, Mythology, cinematic, detailed, atmospheric, epic , concept art, Matte painting, Lord of the rings, Game of Thrones, shafts of lighting, mist, , photorealistic, concept art, volumetric light, cinematic epic + rule of thirdsYou should get an awesome image generated!

You can also check the python process is running using your GPU OK by running:
$ nvidia-smi pmonWhich you can see with the application and shell side by side here.
🎉🎉 Enjoy 🎉🎉
Attribution
Code was forked with 💕 from here. Check it out if you want to build other UI’s to demo with.
